
# 2. Setup Kanuu
First, click here to register your free Kanuu account (opens new window).
Next, you will be automatically directed to our onboarding wizard which will help you set up your team step by step. Note that once you've created your first team you can create as many teams as you need using the same onboarding wizard.
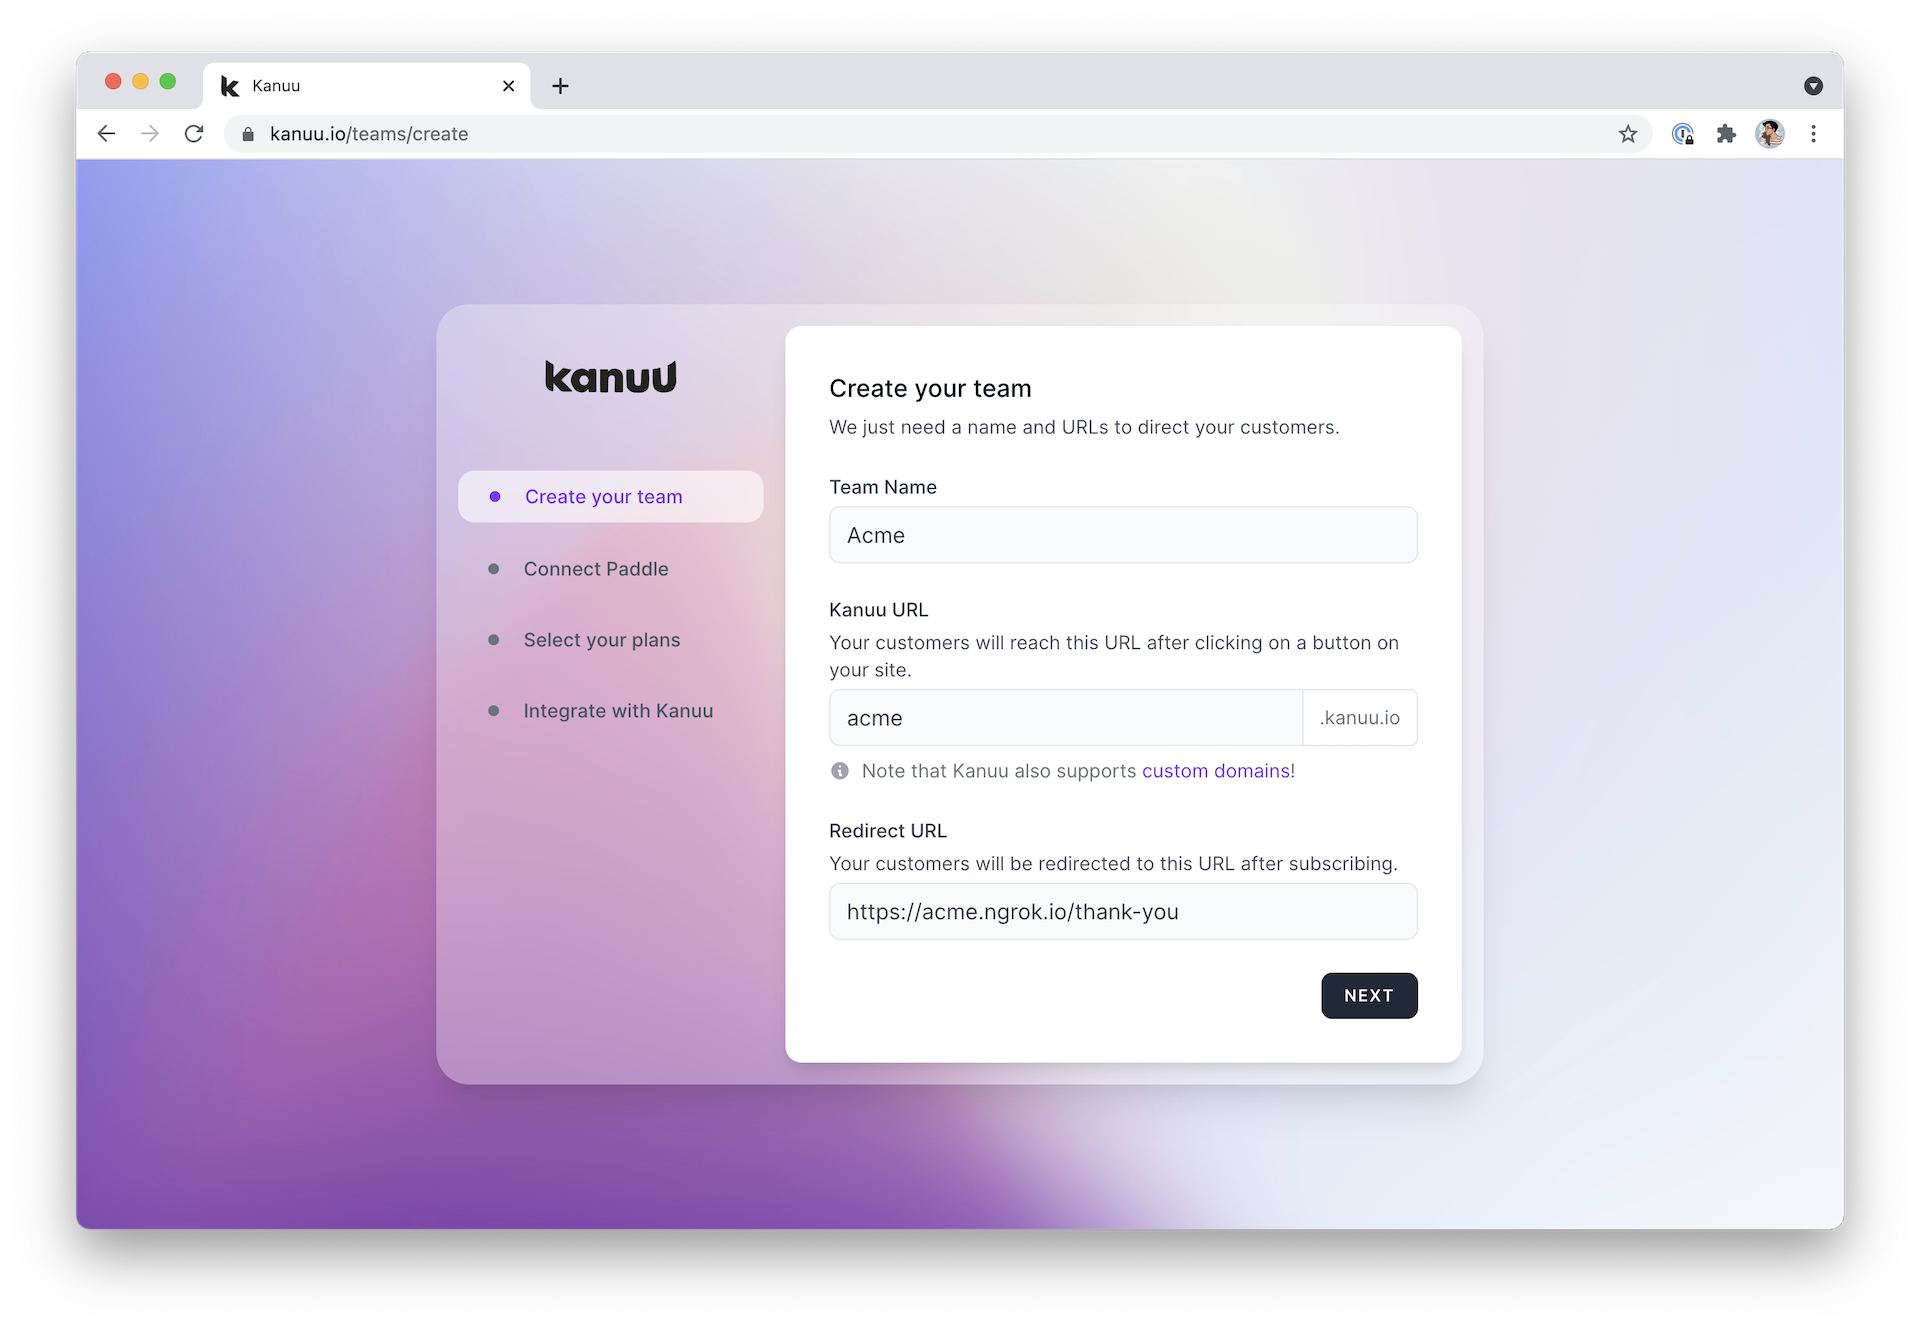
On the first step, you will be asked to enter your team name which will be visible to your customers when they manage their subscription on Kanuu.
Additionally, you'll need to provide a slug defining your unique Kanuu URL and a redirect URL that will be used whenever your customer want to leave Kanuu to go back to your application. Note that you can update and customise your team profile further at any time in the settings.
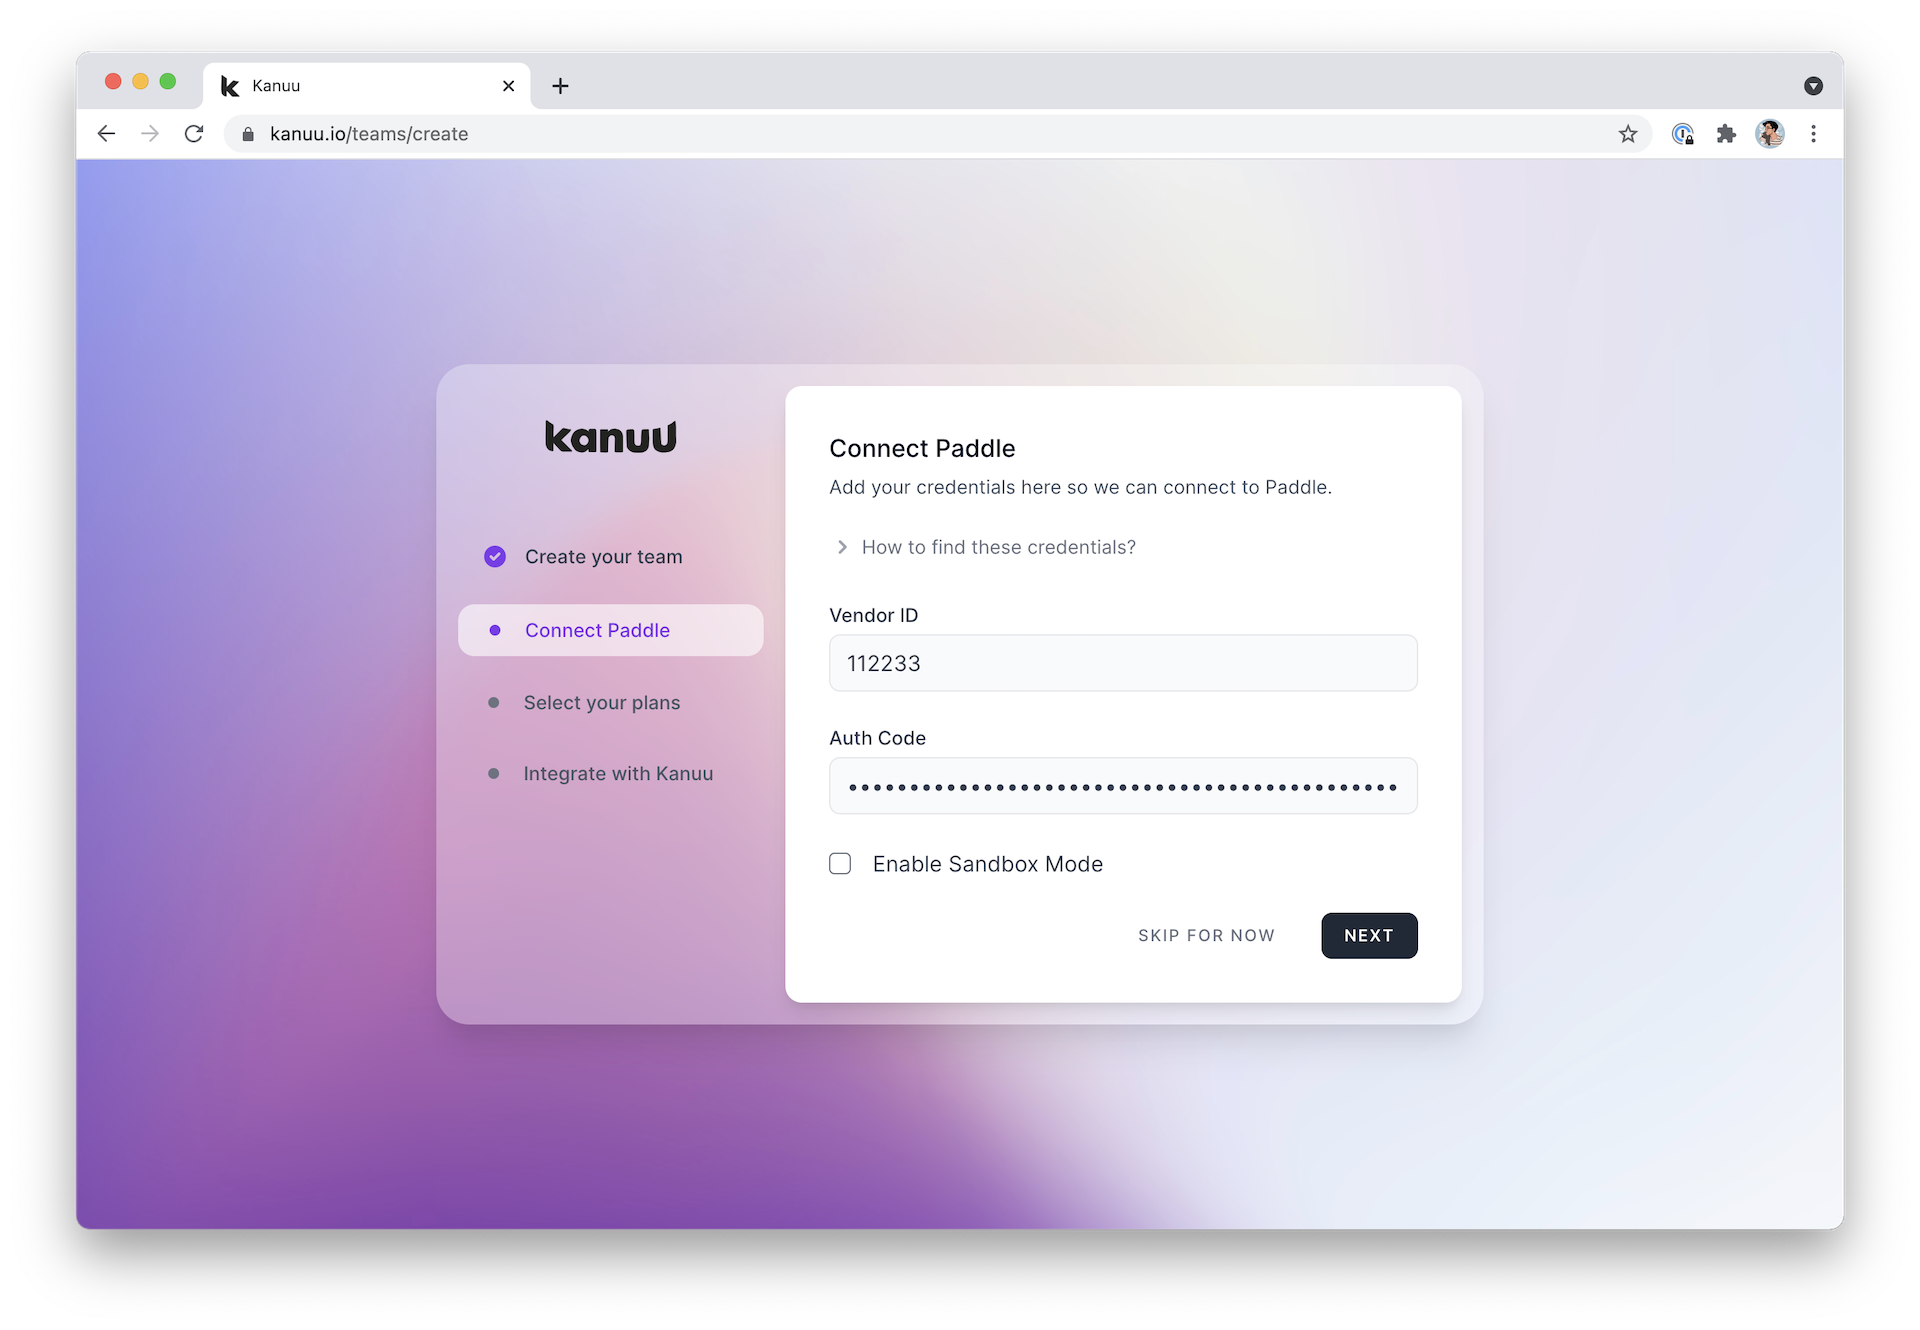
On the next step, you may paste the Vendor ID and the Auth Code you obtained from Paddle in the previous page. Alternatively, you can skip this step and the next one to connect your Paddle account later.
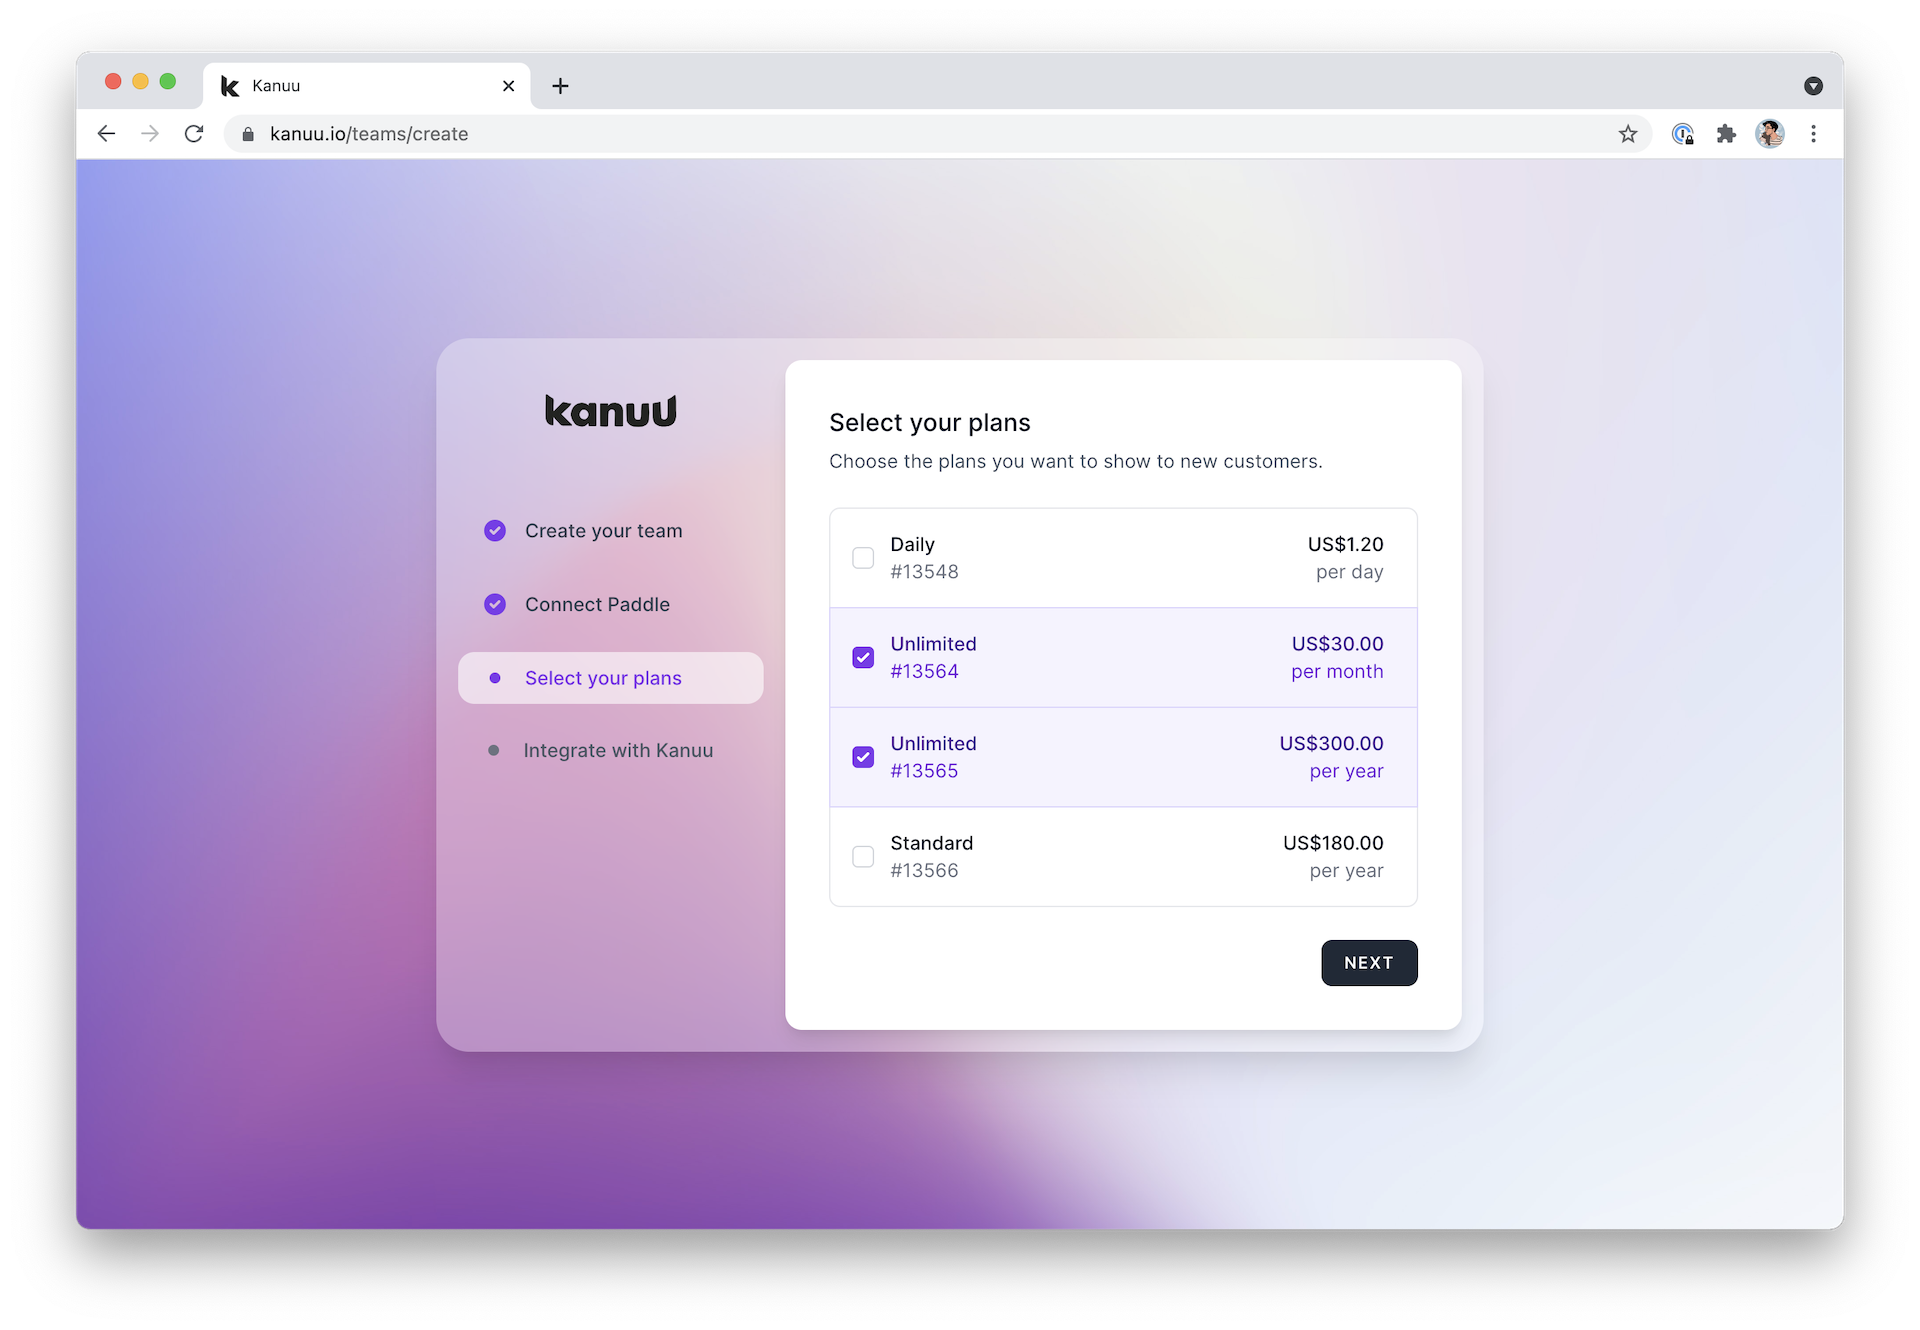
If you have already created your plans on Paddle, you should now see them in the next step. Simply select the ones you want to show to your customers and you're all set up! This feature is useful to hide archived plans to your new customers.
If you don't have any plans created in Paddle yet, worry not, you'll be able to select them and update them in your team's settings at any time. Simply click "Next" to reach the final step.
Now that you're all set up, the last step focuses on helping you integrate your application with Kanuu. This should only take a few minutes and we've already generated an API key for your newly created team. Make sure to store it somewhere safe as it will not be shown again after you press the "Finish" button.
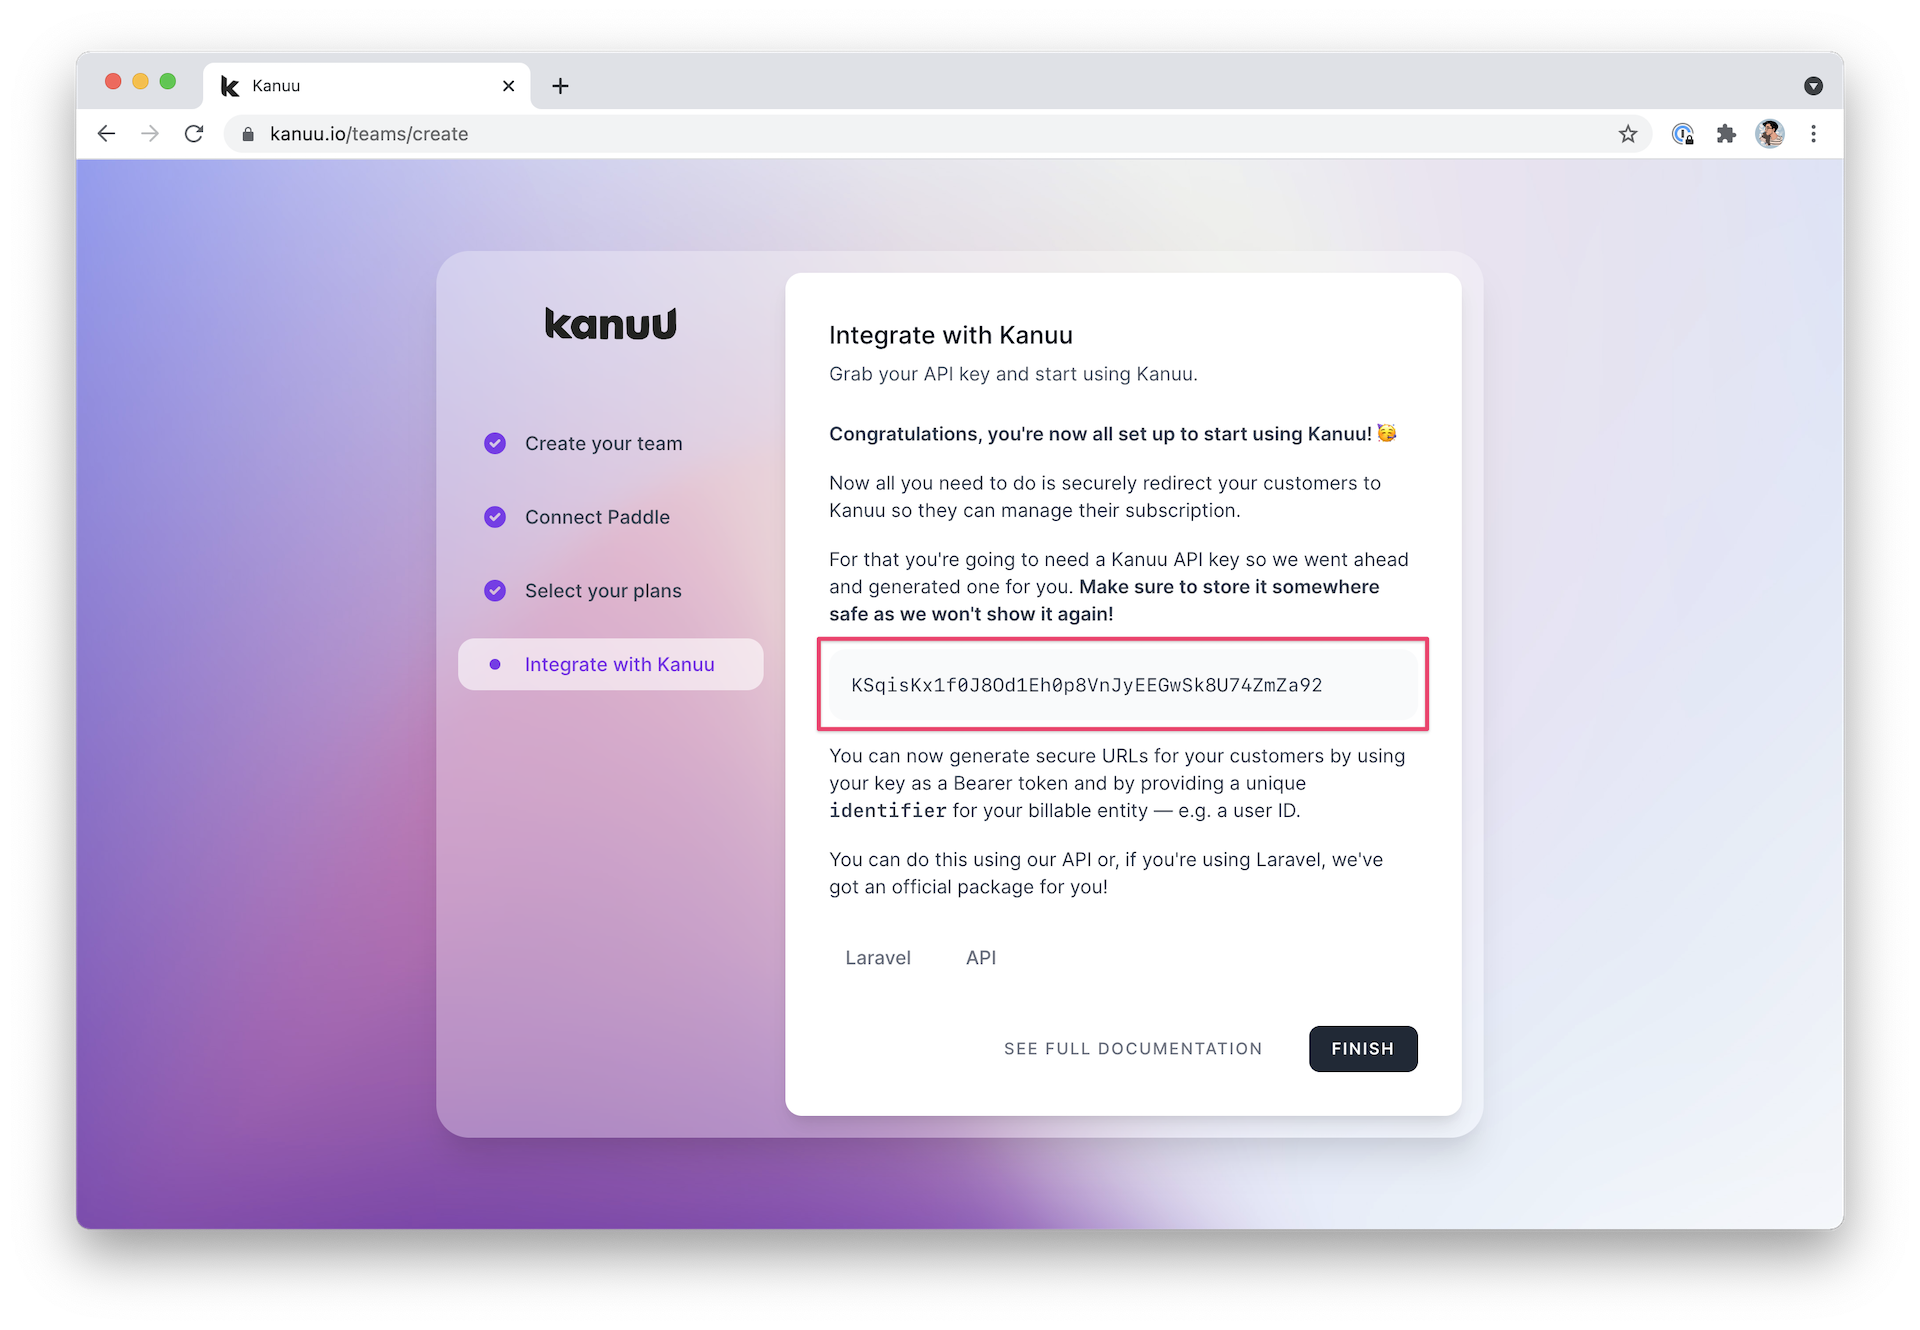
That's it, we now have enough information to generate a billing UI that your customers can interact with.
As mentioned on the final step of the onboarding wizard, there's one last thing to do and that's integrating Kanuu with your application. Fortunately, we make it our mission to make this as easy as possible.
Concretely, this means two thing:
- You'll need to securely redirect your customer to Kanuu when they want to subscribe or manage their subscription.
- You'll need to know if your customers have subscribed or not.
We'll see how to do that in the next and last page of this "Getting Started" guide.